Installing itrezzo UCM, setting up service account mailbox for itrezzo UCM and registering license packs
By: Harpreet Singh Wasu
This is the Part-2 of the Step-by-Step series on how to setup itrezzo UCM for the first time.
To check other blogs of this series, follow the below links:
- Step-By-Step: Setting up itrezzo UCM - Part - I
- Step-By-Step: Setting up itrezzo UCM - Part - 3
- Step-By-Step: Setting up itrezzo UCM - Part - 4
Installing itrezzo UCM
- Once the itrezzo UCM software is downloaded, navigate to the
folder where you saved the installer and double-click on the .exe file & select
Run on the new prompt.

- In the itrezzoAgent Setup wizard, click on Install & select Yes if prompted from User account control permissions.


- Click Next on the Welcome window of the setup.

- Accept the licence terms & click Next.

- Choose the default path for the installation which is
suitable in most cases unless you want to specify a different installation path
of your own choice.

- In the Custom Setup (features selection) window, keep the
default options checked & click Next.

- When you enter the password for the
service account on this screen, a NETBIOS Logon is performed and credentials
are verified from the Active Directory. If the NETBIOS Logon is unable to find
the account or verify the credentials, then check mark the option to Skip
Domain Authentication, provide the credentials & click Next.

- In the Ready to Install itrezzoAgent window, keep the
default option checked to Launch the Setup Wizard after installation . Keep
this option checked if you are installing the itrezzoAgent
for the first time. Select Install. itrezzoAgent will also install the
Silverlight and itrezzo Web Admin automatically during the installation.

- Once the installation is complete, click on Finish.

- Click on Close when you get the installation is successful
message on the screen.


Initial configuration - setting up service account mailbox for iterezzo UCM & requesting License packs
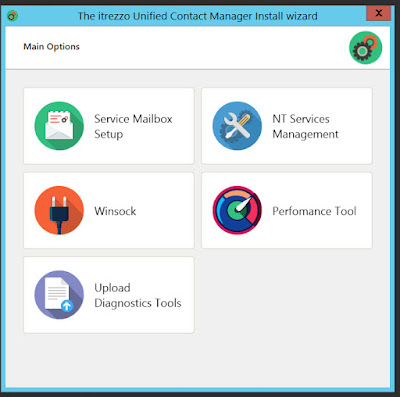
Once the installation is complete, you will the below start
up wizard.

Setting up service account mailbox
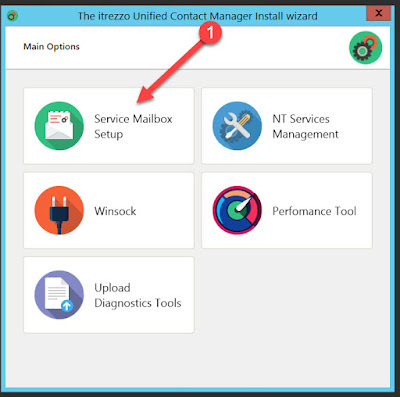
- Now to setup itrezzoAgent, the first thing you have to do is
do choose the Service Mailbox Setup from the itrezzo UCM install wizard. Click
on Service Mailbox Setup tile. This is where itrezzo UCM writes the structures
into the Service Account mailbox that you created earlier in the prerequisitesarticle. This option has the ability to perform the licensing by interacting
with our licensing database. Use the Service Account that was created from the
prerequisites article on this screen.
- Select Exchange for On-Premise Exchange.

- Uncheck the box for Override default.
- Access Type – Use Default Access.
- Choose the correct Exchange Server version from the drop down next to Version.
- Check mark the box for Direct URL and enter the internal
address of the Exchange Server or the URL to access OWA internally because that
is where the EWS stub is located & then click on Validate.

- Once the validation is succeeded, click OK & click Next.

- In the Contact info window, enter a few characters of
your service account mailbox and using GAL lookup you will find the service
mailbox in the drop down, select the appropriate service
account.

- The Email Address box contains the email of the contact person where we send information about the updates and billing. We recommend putting an email address of a user mailbox instead of a Distribution Group or a Shared Mailbox.
- We have an algorithm that generates an Authorization code based on the Service Account email, user email and version installed on the machine. Click on Get to get a new Authorization code. It is very important to get an authorization code as you will not be able to do anything without it. Once you have the code displayed, click on Next. It will save the details on the mailbox.
- Once you click on Get to acquire an authorization code, we
get an email from the licensing server that someone registered for a new
authorization code.

- Click on Next & we are going to get another email.
- You will always get two emails. The first one with subject: itrezzo UCM Registration Succeeded & the other email with subject: Request License Pack. The second email contains the details of the contact person, the authorization code and the version that you install. Make sure to check the contact details and make sure the email should not be reflecting any of your personal domains like gmail or yahoo, it should only be of your Exchange organization’s email, where you are installing itrezzo UCM.
- Make sure Start all services and Launch Web
Administrator options are checked and once verified, click Finish.


Note: For itrezzo UCM, we provide you free licenses for 10 users
which you can use as trial and these are fully functional licenses which are
good to use for one year.
- After, we activate the trail licenses for you from back-end,
you will receive an email with the instructions on how to activate the license
pack. The email with contain an attachment but you do not need to save the
attachment from the email. .


- To install this license pack, please forward the email message
without any modification to the email address of the itrezzoAgent service account
mailbox.

- From the itrezzo Web Admin navigate to the Global
Configuration > License Packs container and click on the small tablet and
gear icon on the grey bar on the upper right.

- Your new license pack should appear in the grid within a minute or two.
- The current version of your itrezzoAgent UCM server is shown at the bottom of the Web Admin in the green bar.


Let's move with our next post of this Step-By-Step series. With Part-3 of this series, you learn how to configure the other options to setup a first sync of contacts to your target user mailboxes.
Click on the below articles to move to follow along with the next set of steps from Part-3 & Part-4 of this series:
No comments:
Post a Comment