How to sync the GAL to your iPhone, Android or BlackBerry
If you have completed the installation of the itrezzo Unified Contact management software, these next steps will allow you sync the GAL to an iPhone, Android, or BlackBerry.
-
Establish an itrezzo Service mailbox. For On-premise, the account must have delegation rights to perform contact updates. For Office 365, create a mailbox on Office 365 and use this method.
-
You will require an application server. On Windows 2012 server, IIS configuration is required. On Windows 2008, the same roles and features are required: ASP.Net, WCF, HTTP Activation, Windows Authentication
-
- Establish an itrezzo Service mailbox. For On-premise, the account must have delegation rights to perform contact updates. For Office 365, create a mailbox on Office 365 and use this method.
- You will require an application server. On Windows 2012 server, IIS configuration is required. On Windows 2008, the same roles and features are required: ASP.Net, WCF, HTTP Activation, Windows Authentication
Post Install Configuration of itrezzo Unified Contact Management
It is suggested that you log on to the server as the itrezzo Service account. On the desktop, you should see the Setup Wizard. Launch this application.

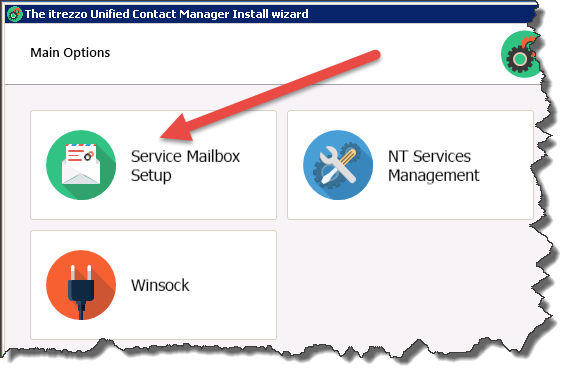
Choose the Service Mailbox Setup
Choose the type of Exchange Server you are running. The screen snapshots shown below are for On-Premise Exchange Server configurations.

If you are logged in as the service account, login field (1) should show the email address of the mailbox. If you know the exact HTTPS URL of the CA, check the box for “Direct URL” (3)
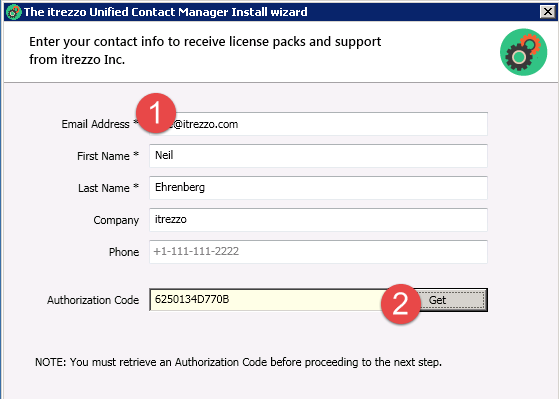
Next run the setup wizard and request an authorization code. License packs will be mailed to you. Please provide your email address (1) and hit the tab key. The remaining fields should get pulled from the GAL.
Hit the Get Button (2) and an Authorization code should be filled in. If no Authcode is filled in, please send an email to help at itrezzo.com.

Clear the checkbox for “Start All Services” and “Launch Web Administrator”.
Request license packs from your itrezzo Customer service Rep. If this is your first time installing our software, you are entitled to five UCM licenses for free for one year.
When you receive the license pack, forward it to the service account mailbox.
Open up setup wizard located on the itrezzo server desktop and start all services under NT Services Management.

Tick the checkboxes to start the top three itrezzo services.
Use the desktop icon to start the web administrator.
Select the Global Configuration container and click on Exchange Logon in the left navigation pane.
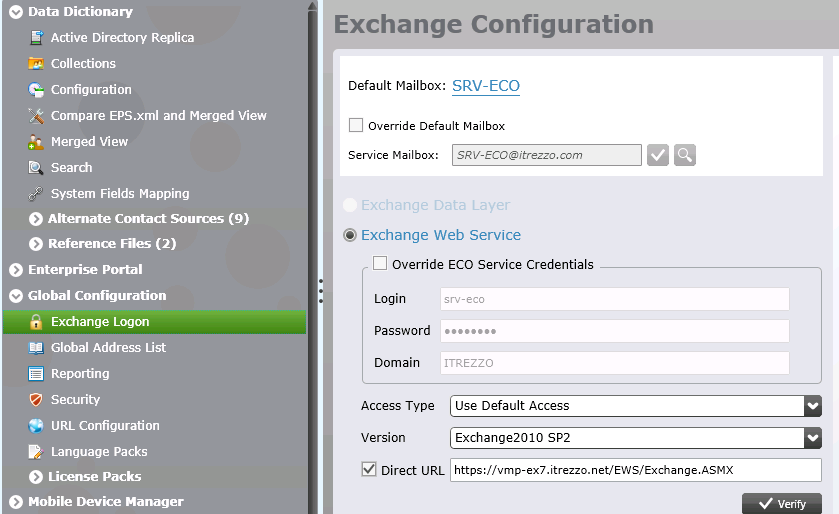
Click the verify button.
a. Create a collection for the GAL, or the group of contacts you want to push. Name the collection appropriately. For example, Everyone, All Staff, or All HQ
b. Create a collection that designates the target users in your pilot. The users that will receive sync’d contacts. These are typically users with smart phones. Let’s call that group Smartphone Users and manually add yourself, or a test mailbox to this collection
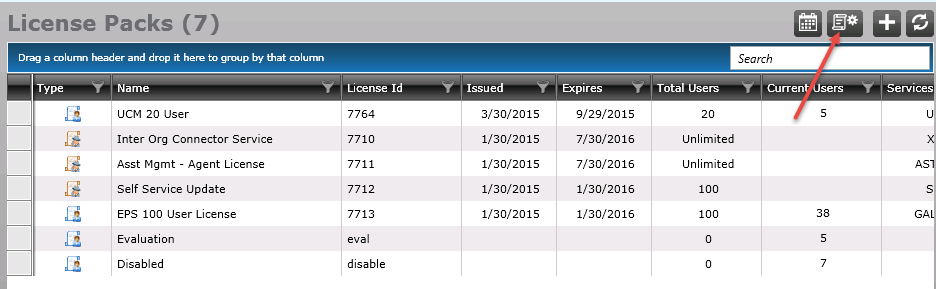
2) The next step will be to auto license Smartphone Users from Global Configuration, License packs
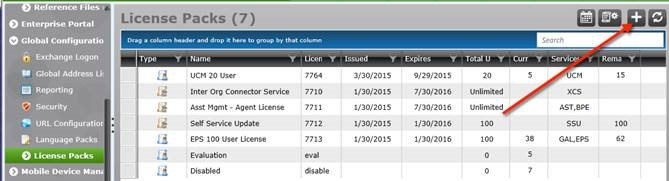
3) After you setup the collection to auto license, click the icon with the gear to force the users to be added to the license pack
4) Next, you will want to create a Mandatory Contact List (Under the Unified Contact Manager). Hit the plus sign to create a new MCL.
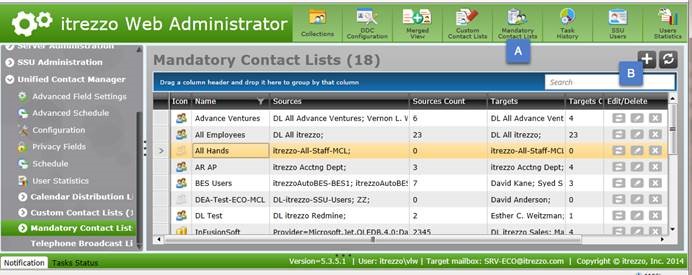
5) Set a descriptive name. Chose the source collection you created (ie Everyone) and then choose All Smartphone Users as the target collection.

6) Save the MCL
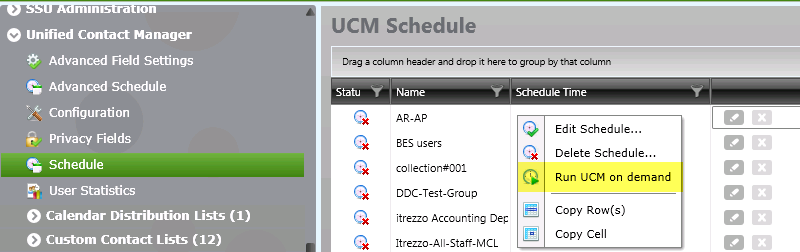
7) Open the Schedule container to Run UCM Now on the All Smartphone users collection.
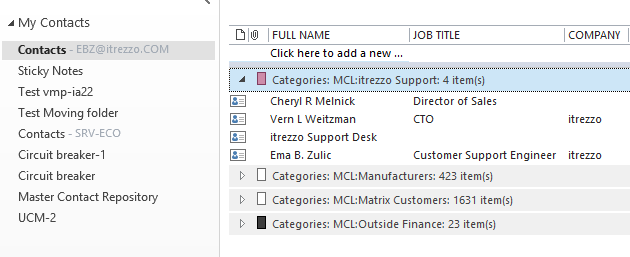
All Smartphone Users should now have Everyone contacts in their Exchange accounts. To verify this, open Outlook account for one user, select People, under current view select List, and under View tab select Categories. Expand MCL category to view contact that have just been synced.
No comments:
Post a Comment